OpenID Connect Users
New in version v0.9.0.
Introduction
OpenID Connect is a widely supported standard that builds on the OAuth 2.0 standard to authenticate users and provide basic profile information about those users.
The user visible part of the login experience when using OpenID Connect is handled by the OpenID Connect provider and may look quite different to the Krill web user interface:
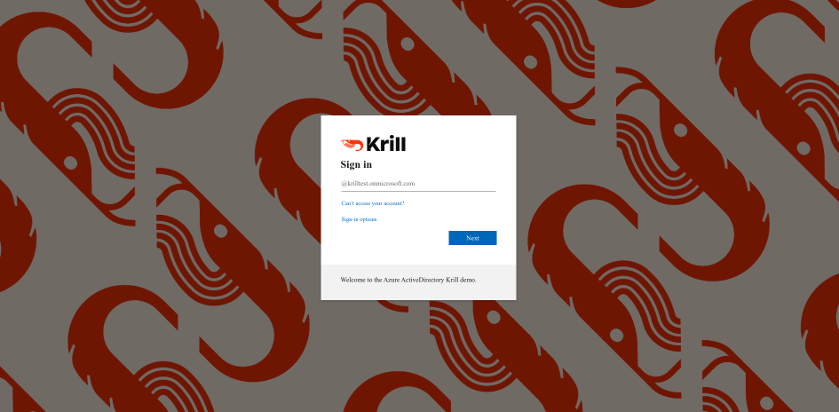
Using Azure Active Directory as an OpenID Connect provider with Krill
To use OpenID Connect Users in Krill you will either need to run your own OpenID Connect provider or use one provided by a 3rd party service provider.
Why OpenID Connect?
From the OpenID Connect FAQ:
What problem does OpenID Connect solve?
It lets app and site developers authenticate users without taking on the responsibility of storing and managing passwords in the face of an Internet that is well-populated with people trying to compromise your users’ accounts for their own gain.
OpenID Connect takes the lessons learned from earlier identity protocols and improves on them. It is widely implemented and deployed, and for situations where the primary identity provider does not implement OpenID Connect there are OpenID Connect providers that can act as a bridge to systems that implement other identity protocols.
As a modern, tried & tested and widely implemented protocol it is therefore quite likely that it is either already in use by (potential) Krill operators or viable for them to adopt.
Why not OAuth 2.0?
From https://oauth.net/articles/authentication/:
OAuth 2.0 is not an authentication protocol.
Much of the confusion comes from the fact that OAuth is used inside of authentication protocols, and developers will see the OAuth components and interact with the OAuth flow and assume that by simply using OAuth, they can accomplish user authentication. This turns out to be not only untrue, but also dangerous for service providers, developers, and end users.
How does it work?
Let’s assume that the OpenID Connect provider is compatible with Krill and that Krill has been registered with the provider (see below for more on these topics).
The user experience
When an end user visits the Krill user interface in their browser they will be redirected to the login page of the OpenID Connect provider. This is NOT part of Krill.
For example, when logging in to a Krill instance connected to the OpenID Connect provider in a large company, the end user might see a very familiar login page. That’s because it is probably a page they have to login to in order to use many other services in their company. Often this login page will even be themed to match the corporate branding.
The user enters their credentials into the OpenID Connect provider login page. At this point Krill knows nothing about who is logging in at the provider login form.
Tip
Krill NEVER receives the username or password that the user enters in to the OpenID Connect provider login page and Krill has no control over the appearance and/or behaviour of the OpenID Connect provider login page.
If the login is successful, from the users perspective their browser is then directed back to Krill where they see the Krill web user interface as if they are logged in. Krill will provide the web user interface with a token which the web user interface should send on subsequent requests to authenticate itself with Krill. The web user interface will keep a copy of this token in browser local storage until the user logs out or is timed out due to inactivity.
Krill will honour any session expiration time communicated to it by the OpenID Connect provider. When using OpenID Connect Users it is therefore possible that the user will be informed that they cannot perform the requested action because their login session has timed out and they need to login again. Where possible Krill will automatically extend the login session to avoid this happening.
In the background
What the user doesn’t see, except perhaps if their network connection is very slow, is that there are “hidden” intermediate steps occuring in the login flow, between the browser and Krill and between Krill and the OpenID Connect provider. These steps implement the OpenID Connect “Authorizaton Code Flow”.
If the user logged in correctly at the OpenID Connect provider login page and Krill was correctly registered with the provider and the provider was correctly setup for Krill, then Krill will receive a temporary Authorization Code which it exchanges for an OAuth 2.0 Access Token (and maybe also an OAuth 2.0 Refresh Token) and an OpenID Connect ID Token.
The ID Token includes so-called OAuth 2.0 claims, metadata about the user logging in. These claims are the key to whether or not Krill is able to determine which rights, if any, to grant to the user that is attempting to login.
Known limitations
OpenID Connect Users avoid the problems with Config File Users but require more effort to setup and maintain:
Requires operating another service or using a 3rd party service.
Confguring Krill and the OpenID Connect provider is more involved than setting up Config File Users.
If Krill cannot contact the OpenID Connect provider, users will be unable to login to Krill with their OpenID Connect credentials. It will however still be possible to authenticate with Krill using its secret token.
Warning
If you encounter HTTP 502 Bad Gateway errors from your HTTP proxy in front of Krill when logging in, or login loops where you are taken back to the OpenID Connect provider login page but the Krill logs show a successful login, you may need to increase the HTTP request and/or response header buffer sizes used by your proxy.
With NGINX this can be done by increasing settings such as
proxy_buffer_size,
proxy_buffers,
large_client_header_buffers
(or http2_max_field_size
and http2_max_header_size
before NGINX v1.19.7). Thanks to GitHub user
racompton for the
large_client_header_buffers tip!
If using Kubernetes use the equivalent NGINX ingress controller
ConfigMap settings, e.g.
http2-max-field-size.
Thanks to GitHub user
TheEnbyperor for the HTTP/2
and Kubernetes tips!
These issues occur because the size of the HTTP request & response headers on login to Krill when using OpenID Connect can be quite large.
Choosing a provider
There are many identity providers that support OpenID Connect to choose from. Some are software products that you can host yourself, others are online services that you can create an account with.
Any OpenID Connect provider that you choose must implement the following standards:
OpenID Connect RP-Initiated Logout 1.0 (optional)
RFC 7009 OAuth 2.0 Token Revocation (optional)
Krill has been tested with the following OpenID Connect providers (in alphabetical order):
Warning
Krill has been verified to be able to login and logout with Google Cloud accounts. However, it is not advisable to grant access to Google accounts in general. Instead you should use a Google product that permits you to manage your own pool of users so that you can restrict access to just these users. Additionally, if you wish to assign different Krill rights to different users you will need some way to mark the users to indicate which role they should receive, e.g. by grouping them or configuring custom claims.
Tip
If your provider does not offer sufficient control over the claim values it exposes to Krill, or if you do not have the ability to change these values to meet your needs, Krill supports a hybrid mode whereby authentication is handled by the OpenID Connect provider, but authorization can be based in whole or in part on config file defined user attributes.
Setting it up
Overview
The process for setting up Krill to support login by users of an OpenID Connect provider follows the same basic pattern for all providers but differs greatly in the details from one provider to the next.
In short, to setup any OpenID Connect provider with Krill the following steps must be taken:
Decide on the settings to be configured
Ensure you have the basic pieces of information that you need. For example:
Which URL will Krill be available at?
Which user(s) will have admin rights in Krill?
Is there some property of these users that distinguishes them from other users (for example they may already be members of some internal Active Directory group) or will you need to mark them out in some way so that Krill can spot that they should be admins?
Is this property available by default as part of the standard claims sent by the provider to the client, or is it a provider specific claim or will it need to be configured in the provider as a custom claim? [1]
Gain access to the provider
This could be installing and operating provider software yourself, or signing up to a cloud service, or arranging for support from your internal IT department to have changes made to your in-house provider on your behalf.
Register Krill with the provider
You will need to supply the Krill redirect URLs: [2]
https://yourdomain/ (if the provider supports Connect RP-Initiated Logout 1.0)
You should receive back from the registration process three pieces of information that will be needed to configure Krill:
The provider OpenID Connect Discovery 1.0 issuer URL [3]
A client ID
A client secret
Create users, groups and/or claims in the provider
If all of your users will have admin rights in Krill you can ignore groups and claims and just create users.
If however you want some users to have different rights than other users you will need to configure your provider to include some hint about the role that a user should have in the claims data that it sends to Krill.
The manner in which this is setup varies greatly by provider. With Keycloak for example you have direct control over the claim data that is exposed to the OpenID Connect client and have multiple different ways to tell Krill via the claims data which role each user should have in Krill.
With Azure Active Directory however you are by default limited to only being able to expose claims that it defines or to add users to groups. The group memberships can be exposed as claim data and Krill can parse the group data and match against it.
Configure additional provider features
How long are the tokens issued by the provider valid for? Can the provider issue refresh tokens? These properties affect how long a user can remain logged in to Krill.
Ensure that the provider has a real TLS certificate, or for in-house certificates you will need a copy of the Certificate Authority root certificate so that you can configure Krill to trust it. If neither are possible you can configure Krill to trust the insecure certificate anyway, but this is not advised.
Do you need to configure the provider to ensure that the claims you want to use will be sent to Krill?
Configure Krill
Lastly, add the issuer URL, client ID and client secret to
krill.confand if necessary configure any claim mapping rules to instruct Krill how to obtain role information from the claims data that it will be sent.You may also need to use some of the other OpenID Connect specific configuration settings that Krill offers. For example to use the Amazon Cognito logout endpoint you have to configure that manually.
Tip
The
krill.conffile contains example configurations for providers that Krill has been tested with.
Using Keycloak
In this section you will see how to setup Keycloak as an OpenID Connect provider for Krill.
The following steps are required to use OpenID Connect Users in your Krill setup.
1. Decide on the settings to be configured.
For this example let’s assume we want to configure the following users:
Username |
Password |
Role |
|
|---|---|---|---|
dFdsapE5 |
admin |
||
sally |
wdGypnx5 |
readonly |
|
dave_the_octopus |
qnky8Zuj |
readwrite |
And let’s assume that we are going to use a local Docker Keycloak container as our OpenID Connect provider which will be running at https://localhost:8443/.
2. Configure the provider
Let’s walk through configuring the provider step by step:
Download and run Keycloak
$ sudo docker run \
    --detach \
    --name keycloak \
    --publish 8443:8443 \
    --env KEYCLOAK_USER=admin \
    --env KEYCLOAK_PASSWORD=password \
    --env DB_VENDOR=h2 quay.io/keycloak/keycloak:12.0.4
Warning
Do NOT run Keycloak like this in production. This command instructs Keycloak to use an in-memory H2 database which is convenient for demonstration and testing purposes but should not be used in a production setting.
Note
If IPv6 is enabled for Docker then Keycloak may fail to
start with error failed to resolve interface private.
One way to work around this problem is to append the
following to the docker run command:
-Djboss.bind.address.private=127.0.0.1 -Djboss.bind.address=0.0.0.0
Follow the logs until Keycloak is ready:
$ docker logs --follow keycloak
...
14:31:20,766 INFO  [org.jboss.as] (Controller Boot Thread) WFLYSRV0025: Keycloak 12.0.4 (WildFly Core 13.0.3.Final) started in 23954ms - Started 687 of 972 services (687 services are lazy, passive or on-demand)
14:31:20,768 INFO  [org.jboss.as] (Controller Boot Thread) WFLYSRV0060: Http management interface listening on http://127.0.0.1:9990/management
14:31:20,769 INFO  [org.jboss.as] (Controller Boot Thread) WFLYSRV0051: Admin console listening on http://127.0.0.1:9990
Login to the Keycloak admin UI
Browse to https://localhost:8443/.
Accept the self-signed TLS certificate.
Click on Administration Console.
Login as user admin password password.
Create a realm
Note
A realm is a Keycloak concept and is a good example of how providers differ in what needs to be done to set them up.
Hover over Master in the top left and click on the Add Realm button that appears.
Set the field values as follows then click Create:
Field
Value
Name
krill
Create a client application
Tip
This is where we register Krill with the OpenID Connect provider.
Continuing in the KeyCloak web UI with realm set to krill:
Click Clients (top left) then Create (top right).
Set the field values as follows then click Save:
Field
Value
Client ID
krillOn the Settings tab that is shown next set the field values as follows then click Save at the bottom.
Field
Value
Access Type
confidential [4]
Valid Redirect URIs
https://localhost:3000/*[5]Generate credentials for Krill to use:
Open the Credentials tab (at the top).
Copy the Secret value somewhere safe, we’ll need it later.
Configure a role mapper
Tip
This is where we create custom claims that Krill can detect and use to determine which rights in Krill to assign to the user.
Open the Mappers tab (at the top) and then click Create.
Set field values as follows then click Save at the bottom:
Field
Value
Name
krill_role
Mapper Type
User Attribute
User Attribute
role
Token Claim Name
role
Claim JSON Type
String
Create the users
Click Users (on the left) then click Add User (top right).
Set field values as follows then click Save at the bottom:
Field
Value
Username
<THE USERS NAME>
Email [6]
<THE USERS EMAIL ADDRESS>
Open the Credentials tab and set the field values as follows:
Field
Value
Password
<THE USERS PASSWORD>
Password Confirmation
<THE USERS PASSWORD>
Leave Temporary set to ON. [7]
Click Set Password.
When asked “Are you sure you want to set a password for this user?” click Set password.
Open the Attributes tab.
Enter Key role with value <THE USERS ROLE> and press Add.
Click Save at the bottom.
Repeat the above adding the other users.
3. Configure Krill
Add the following to your krill.conf file: (remove or comment out
any existing auth_type line)
auth_type = "openid-connect"

[auth_openidconnect]
issuer_url = "https://localhost:8443/auth/realms/krill"
client_id = "krill"
client_secret = "<SECRET VALUE SAVED EARLIER>"
insecure = true [8]
4. Go!
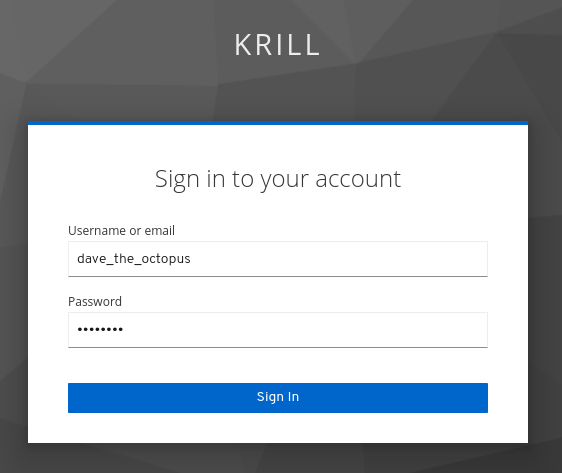
Restart Krill and browse to the Krill web user interface. Your users should now be able to login with the Keycloak login form.
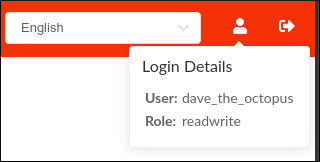
Once logged in your users should have the role that you assigned to them:
With other providers
The OpenID Connect Users support within Krill is intended to be able to connect to and work with as many OpenID Connect providers as possible.
As such there are quite a few extra configuration options listed in
krill.conf each of which is accompanied by documentation explaining
what it does and how to use it.
Rather than duplicate that documentation here, instead we will focus on a few of the more difficult features to use and problems to overcome.
Understanding claims
Before we look at how to match claims let’s first take a look at what claims actually are and what it is that Krill has to match against.
Claims are part of the JSON data sent by the provider to the client. Krill must first extract this JSON data from the encoded, signed JWT data. The resulting claims look something like this:
{
  "iss": "http://server.example.com",
  "sub": "248289761001",
  "aud": "s6BhdRkqt3",
  "nonce": "n-0S6_WzA2Mj",
  "exp": 1311281970,
  "iat": 1311280970,
  "name": "Jane Doe",
  "given_name": "Jane",
  "family_name": "Doe",
  "gender": "female",
  "birthdate": "0000-10-31",
  "email": "janedoe@example.com",
  "picture": "http://example.com/janedoe/me.jpg"
}
Krill uses claims to determine two things: the user ID – which is both shown in the UI and logged in the Krill audit logs –, and the roll which determines access permissions.
For each rules can be defined in their own section,
[[auth_openidconnect.id_claims]] for the user ID and
[[auth_openidconnect.role_claims]] for the role.
For instance, if you want to configure Krill to use the “given_name” claim as the ID of the user in Krill, you can do this like so:
[[auth_openidconnect.id_claims]]
claim = "given_name"
Given the example claims above, would use the value “Jane” as the ID of the user logged in to Krill.
Default claims configuration
By default, Krill uses the value of the “email” claim as the user ID and the value the “role” for the role. Given that the example claims above don’t contain a “role” claim, Krill would reject a login with the defaults since it doesn’t know what role to use.
Matching claims by name
Imagine that you want to show users by their name in the Krill web user interface and not by their email address, and that you know that the full name is available in a claim called name.
This can be achieved using a config section that looks like this in
krill.conf:
[[auth_openidconnect.id_claims]]
claim = "name"
This tells Krill to search all of the claim data it receives for a field called name and use that as the ID for the user in Krill. This ID will also be logged in the Krill event history as the actor responsible for any events that they caused.
Matching claims by value
Imagine that your users already exist in an OpenID Connect compatible identity provider and that the only distinguishing feature that you can use to assign them admin or some other role within Krill is their group membership. Now imagine that these groups do not have nice friendly names but instead are identified by an array of UUIDs!
How do you tell Krill which users should have readonly access and which users should be have readwrite access?
This is actually a real situation you can encounter with Azure Active Directory. The rules in this case are a little more complicated:
[[auth_openidconnect.role_claims]]
claim = "groups"
match = "^gggggggg-gggg-gggg-gggg-gggggggggggg$"
subst = "readonly"

[[auth_openidconnect.role_claims]]
claim = "groups"
match = "^hhhhhhhh-hhhh-hhhh-hhhh-hhhhhhhhhhhh$"
subst = "readwrite"
We define two rules for the role claims. These are processed in order and the first matching rule is used. Let’s break them down:
The
claimfield is the name of the claim to look for. In both cases we are looking at the"groups"claim.The
matchfield contains a regular expression matching the UUIDs of the groups. Because regular expressions happily match partially, we need the hat and dollar symbols to force a match of a complete value.The
substfield contains a value to substitute the match with. While you can refer to match groups in the regular expression, we don’t need this here and just want to replace the value with the names of the roles.
The "groups" claim is an array with multiple groups. Each rule will go
over all the values in the array and try and match them. Only if that doesn’t
succeed is the next rule tried. Thus, if a user has both the “g” group and
the “h” group, the first rule will apply and the user will be assigned the
"readonly" role. It is important to keep this ordering in mind when
writing the configuration.
Matching claims by partial value
Now imagine that the group membership is instead expressed not as array elements that each exactly match some group name or UUID that we can look for, but that each array element is a long string composed of key=value comma separated pairs.
This can happen when the identity provider expresses group memberships in LDAP X.500 format (see RFC 2253 Lightweight Directory Access Protocol (v3): UTF-8 String Representation of Distinguished Names).
For example you might see something like
CN=Joe Bloggs,OU=NetworkTeam-Admins,DC=mycorp.com,
representing a user called Joe who is in the administrators group of the
networking team of a company called mycorp.com.
Hopefully you’ll only need simple rules but also equally hopefully if you need more powerful matching Krill will be up to the task. For example, here’s a more complicated rule:
[[auth_openidconnect.role_claims]]
claim = "memberof"
match = "^CN=DL-Krill-(?P<role>[^-,]+).+"
subst = "$role"
This rule will match elements of an array called "memberof" whose value
starts with CN=DL-Krill-, and wlll then extract just the part after that
upto a comma or dash, and will use that captured value as the role for the
user.
Requesting missing claims
If you find that expected claim data is indeed not being sent by the provider this may not be an issue with the provider, rather it may be that the provider requires that Krill ask to be sent those claims.
Look at the extra_login_scopes setting in krill.conf, at
OpenID Connect Core 1.0 section 5.4 Requesting Claims using Scope Values
and at the documentation for your provider. Try and determine if
there is a particular “scope” value that should be sent by Krill that
is not currently being sent.
Diagnosing login problems
If you think your OpenID Connect provider should be providing certain claims about your users but are not sure, or if you are not redirected properly to the OpenID Connect provider login page or are not redirected post-login back to Krill, you can increase the log level.
log_level = "debug"will cause Krill to log more about what it is doing.
log_level = "trace"will cause Krill to log OpenID Connect requests and responses.
Note however that some of the communication will be between your browser and the OpenID Connect provider and that will not be visible in the Krill logs. To monitor that you will need to use the network inspector tool of your browser to see the requests and responses being exchanged.
Warning
Trace level logging is VERY verbose and can reveal sensitive
information such as OAuth 2.0 Access Tokens and users profile
data. Only enable trace level logging while investigating a
problem. Normally it should be sufficient to use log_level = "warn".